There’s nothing worse than a bathroom that stays damp, musty, and fogged up long after a hot shower. That lingering moisture isn’t just an annoyance; it’s an invitation for mold, mildew, and potential damage to your walls and ceilings. Installing a bathroom exhaust fan is one of the most impactful home improvement projects you can tackle, and while it might seem intimidating, it’s entirely achievable for a confident DIYer.
This guide will walk you through the entire process, from choosing the right unit to the final flip of the switch, ensuring you can enjoy a fresher, healthier bathroom. Plus, getting this ventilation right is one of our top Small Bathroom Design Tips for making a compact space feel larger and more comfortable by instantly clearing steam and odors.
Why You Need a Bathroom Exhaust Fan 🍃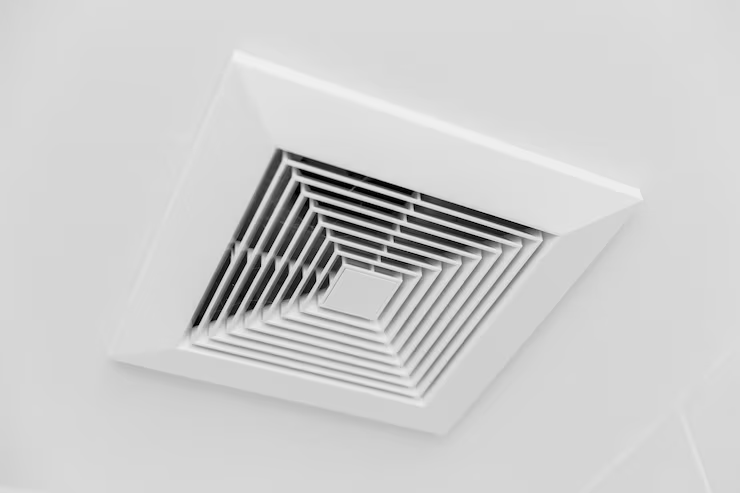
Before we dive into the tools, let’s solidify the “why.” A good exhaust fan is a silent guardian for your bathroom. It actively works to protect your home and your health by:
- Preventing Mold and Mildew: Moisture is mold’s best friend. By quickly removing humid air, you eliminate the damp environment where mold spores thrive, protecting your walls, ceiling, and even your towels.
- Protecting Your Home’s Structure: Over time, excess moisture can warp wood, peel paint, and damage drywall. An exhaust fan helps preserve the integrity and value of your home.
- Improving Air Quality: It efficiently removes unpleasant odors and airborne contaminants, making your bathroom a more pleasant and healthier space for everyone.
- Reducing Mirror Fog: Say goodbye to wiping down the mirror with your hand or a towel after every shower! A clear mirror is a small but daily quality-of-life improvement.
What You’ll Need: Tools & Materials 🛠️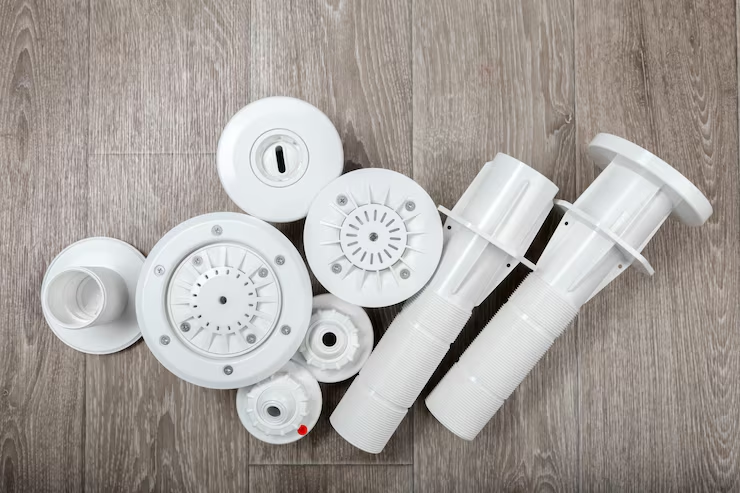
Gathering everything before you start is half the battle. Here’s a typical checklist:
- New Bathroom Exhaust Fan Unit: (Choose one appropriate for your bathroom’s size, measured in cubic feet per minute – CFM).
- Screwdrivers (Phillips and flat-head)
- Drill & Drill Bits
- Jigsaw or Keyhole Saw
- Pencil & Tape Measure
- Wire Strippers & Voltage Tester (CRITICAL for safety)
- Wire Nuts & Electrical Tape
- Ductwork (Rigid or flexible, but rigid is preferred for better airflow)
- Duct Clamps & Exterior Vent Cap
- Safety Gear: Gloves and safety glasses.
Your Step-by-Step Installation Guide
Step 1: Choose the Perfect Location
The ideal spot for a fan is directly over the shower or bathtub, as this is the primary source of moisture. However, the unit must be rated for use in a “wet location.” If that’s not possible, the next best location is in the center of the ceiling. Ensure there’s clear access to an attic above or a way to run ductwork to an exterior wall.
When planning, consider the overall style of your space; just as you would choose between different Types of bathroom shower (like a walk-in vs. a framed alcove), you can choose a fan with features like a light, heater, or night-light to match your needs.
Step 2: Turn Off the Power ⚡
This is the most important safety step. Go to your main electrical panel and turn off the circuit breaker that supplies power to the bathroom’s lighting circuit. To be absolutely sure, use your voltage tester on the existing light’s wires before you touch anything. A little caution here prevents a very dangerous situation.
Step 3: Access and Prepare the Area
If you’re replacing an old fan, you’ll need to remove it first. If you’re installing in a new location, you’ll be creating a new hole. From the attic, clear away any insulation from the work area. If you don’t have attic access, you’ll be working entirely from the bathroom ceiling.
- For a new installation: Use the template from the fan’s packaging to trace the opening onto the ceiling drywall. Carefully drill a starter hole and use your jigsaw to cut out the opening.
- For a replacement: Remove the old fan’s cover and grille, disconnect the wiring, and unscrew the unit from its housing to remove it.
Step 4: Install the New Fan Housing
Lift the new fan housing into the ceiling opening. The housing should have flanges or brackets on the side. Secure these firmly to the ceiling joists using the provided screws. A wobbly fan is a noisy fan, so make sure it’s snug. If the joists aren’t in the right place, you may need to install wooden braces between the joists to secure the housing.
Step 5: Connect the Ductwork
Attach the ductwork to the exhaust port on the fan housing. Use foil tape (not standard duct tape) or a duct clamp to create a secure, airtight seal. Run the ductwork in as straight a path as possible to an exterior vent cap. Avoid kinks or sags, as these can trap moisture and reduce efficiency. The vent should always terminate outside your home, never into an attic, crawlspace, or soffit.
Step 6: Make the Electrical Connections
Carefully bring the existing household circuit wires into the fan’s electrical box. Connect the wires by color: black (hot) to black, white (neutral) to white, and green or bare copper (ground) to the ground wire or grounding screw in the box. Secure each connection with a wire nut and wrap it in electrical tape for good measure. Gently tuck all the wires safely into the electrical box.
Step 7: Attach the Fan Unit and Grille
Once the housing is secure and the wiring is complete, it’s time to attach the fan motor assembly (if it was separate) and the decorative grille or cover. This is the satisfying part where it all starts to look finished! Snap or screw the cover into place. Just like choosing the right shower floor tiles can tie the whole room’s design together, a clean, modern fan grille acts as a subtle but polished finishing touch to your ceiling.
Step 8: Restore Power and Test Your Work
Go back to the electrical panel and turn the power back on. Return to the bathroom, flip the switch, and listen to the beautiful, quiet hum of success! Hold a piece of toilet paper up to the grille; if it sticks, you know your fan is pulling air effectively.
You’ve Mastered Home Ventilation!
Congratulations! You’ve successfully installed a bathroom exhaust fan, an upgrade that will pay for itself in home protection and daily comfort. You’ve tackled a project that improves your home’s air quality, prevents costly moisture damage, and makes your bathroom routine more pleasant. No more wiping down wet walls or dealing with that stubborn musty smell.
Now that you’ve created a drier, healthier environment, why not take on another project to perfect your space? Your newly ventilated bathroom is the perfect canvas for your next DIY triumph.


