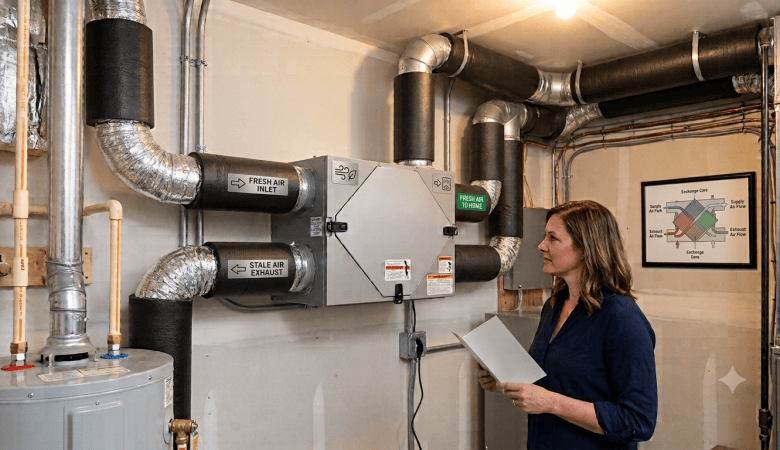

Many plumbing systems are designed incorrectly, because the design starts by selecting a piece of equipment, like which water heater should we buy? If instead, designing a high-efficiency plumbing system is meant, it has to be designed in reverse. The fixtures would decide the kind of feature you would need, that would tell you how big or small that could be. Then the fixtures would lay out the distribution of the pipe, the pipe layout size, and the equipment size.
Table of Contents
Start with peak simultaneous demand, not bedroom count
Most quotes for a new home end up being sized off a rule of thumb: three bedrooms, two bathrooms, X-litre heater. The ratio works well in the sense that makes the house about our size and has similar water flows. But you know how it is on a Monday morning. Someone is running late so the shower is cranked and having a long shower, the dishwasher’s just reached the rinse cycle and a tap gets left on in the laundry.
You could just repipe the whole house in inch-and-a-half tube if you like, but that’s wasteful just like throwing a boiler that generates more heat or water than you need into the basement. The right way to figure peak simultaneous demand is to list every fixture in the house and its flow rate – shower, kitchen sink, bathroom taps, laundry, dishwasher connection – then work out your worst realistic overlap. That’s your peak simultaneous demand, usually measured in litres per minute. It’s the single number that should drive every downstream decision about pipe sizing and heater capacity. Skip this step and you’re guessing.
This matters more with electric instantaneous hot water systems than with storage tanks, because a tankless unit has a hard ceiling on flow rate. A tank can lean on stored reserve during a short spike. A tankless unit can’t exceed its rated output, full stop. If your peak demand calculation shows two showers and a kitchen tap running together, your heater selection has to be built around that number, not around what feels like a reasonable size for the house.
Choose the pipe layout before you choose the heater
Once you have the demand figured out, the big follow-up is how the water is actually coursing through the house. Trunk-and-branch copper – the setup where you have one big main line breaking off into smaller runs – is still everywhere, but it’s not the smartest play these days.
A manifold, or home-run, layout where you’re using PEX piping to send a dedicated line straight from a central manifold to each and every fixture is the better layout. No branching means fewer joints, and it also means fewer spots where pressure could drop or leaks could form. Since each fixture has its very own line right back to the manifold, pressure remains even throughout the house, even when multiple things are running at once. That balance is what keeps someone’s shower water from turning ice-cold the instant the clothes washer kicks on.
PEX also loses less heat over the course of each water line than copper. And it’s more flexible and easier to feed through tight stud spaces, which developers tend to whittle down to absolute minimum measurements in newer homes. If you’re planning for maximum efficiency, the manifold layout is not a luxury add-on. It’s the skeletal system that makes it so everything else downstream – including your tankless heater – works the way it’s supposed to.
Insulate the runs that actually lose heat
Insulation is often the first thing to get scratched off the list when budgeting for a renovation or a new home. It shouldn’t be. The first few metres of pipe leaving the heater lose more heat than any other section, because that’s where the temperature differential between the water and the surrounding pipe is highest. Wrapping the first 3 metres out of the unit, plus any run through a garage, subfloor, or unheated crawl space, cuts standby and en-route losses noticeably.
This is cheap to do during construction and stupidly expensive to fix later. A few dollars of pipe lagging at the rough-in stage is the difference between water arriving at the tap close to its set temperature or several degrees cooler, forcing the heater to work harder to compensate.
Pick the heater during rough-in, not at handover
Many new builds make a critical error. The water heater is an afterthought, often sized only after the electrical rough-in is already completed.
New build electric tankless installations draw a massive amount of current over a very short period of time because they’re heating water as it’s used rather than from a stored tank. If you oversize your unit or go electric instead of gas, you’ll overload the existing 30-amp tank-type circuit. New unit circuits range from 40 to 60+ amps, so if this isn’t planned for before the rough-in electrician is finished, you’re either upgrading to a new electrical panel at a cost of thousands of dollars or you’re downgrading to a rather small model of electric tankless. Neither option is good!
Planning early is simple. Just get your water heater type and rough size chosen. This decision must be made before the first nail is hammered and the first wire is pulled. Electrical, plumbing, and heater selection need to happen as one conversation, not three sequential ones.
Central unit or point-of-use, or both
This is where the demand calculation from step one earns its keep. Electric instantaneous heaters have a finite flow rate, usually somewhere between 12 and 20 litres per minute depending on the model and the incoming water temperature. If your peak demand number sits comfortably under that ceiling, a single central unit handles the whole house. If it doesn’t – a large home with multiple bathrooms likely to be used at once, for instance – you’ve got two options: step up to a larger-capacity unit, or pair a central heater with a small point-of-use unit for a distant bathroom that would otherwise suffer long wait times and pressure drop.
For homes without a natural gas connection, this is usually where the design lands on electric instantaneous systems as the central heating solution. There’s no standby heat loss sitting in a tank 24 hours a day, the unit’s footprint is small enough to fit in a cupboard or utility space, and it integrates cleanly with a manifold layout since it’s just supplying one central point rather than a network of storage. The combination of zero standby loss and compact installation makes it the strongest central option once gas isn’t in the picture.
Point-of-use units aren’t a downgrade, either. They’re a targeted fix for a specific distance problem, letting the central system stay right-sized instead of being oversized just to serve one awkward bathroom.
Protect the system with expansion tanks and hammer arrestors
Homes that have backflow preventers or pressure-reducing valves create closed plumbing loops. For pressure spikes to go somewhere in a closed loop, a thermal expansion tank will absorb the pressure as the water heats and expands. This protects the joints, the valves, and the heater itself from the strain they weren’t built to handle.
Water hammer arrestors solve a related but different problem. When fast-closing valves, like those on washing machines and modern mixer taps, shut suddenly they can send a shock wave back through the pipes. If left untreated, this hammering will loosen joints and over time will wear down valve seats. Neither of these components costs much to install during construction, yet both become expensive to retrofit once the walls are closed up.
Balance pressure so mixer valves actually work
Thermostatic mixing valves are balanced when the amount of hot water and cold water being supplied to the valve is approximately equal. This allows for the most accurate water temperature and the widest range of the thermostatic feature to operate as intended. When the hot water side is running at a much higher pressure than the cold water side, the thermostatic mixing valve is unable to react quickly enough due to the pressure difference.
This can cause cold water to go unnoticed in the lines while a shower is running or scalding hot water to be sent through the lines. It also causes the thermostatic mixing valve to smooth the flow of water less effectively as it relies on an even volume of water being pushed through the valve for the blending action to take place. Balancing pressure at the manifold, rather than trying to fix it fixture by fixture, solves this at the source. It’s a design step, not a repair step, and it’s far easier to get right before the walls close in.
Use low-flow fixtures to shrink the whole problem
For every litre per minute you reduce a fixture’s flow rate, your heater doesn’t need to supply it. Showerheads and aerated taps with WELS 6L/min or less reduce total house demand noticeably without anyone ever taking a weaker shower.
And it directly translates to heater sizing. Low total demand means a smaller, cheaper instantaneous can service the same house. It is one of the few upgrades that pay for themselves on the spec sheet before that house is even built. Lower fixture flow, lower heater capacity requirement, lower electrical load, lower running cost.
Don’t skip compliance
In an Australian context, the heater itself must simply carry an appropriate GEMS star rating, and the full installation – piping, electrical clearance, discharge points – must meet the requirements as set out in the National Construction Code, specifically the Plumbing Code of Australia volume. This shouldn’t be treated as just a box-ticking exercise. GEMS ratings provide a real, comparable measure of energy performance between models and NCC clearance requirements exist because electric water heaters near wet areas pose real safety risks if installed poorly.
Advanced upgrade: drain water heat recovery
For builds pushing for the highest possible efficiency, a drain water heat recovery system is worth considering. It’s a heat exchanger fitted around the main drain line that captures warmth from outgoing greywater – shower and bath water especially – and uses it to pre-heat incoming cold water before it reaches the heater. It’s not standard on most builds, but on a home with multiple daily showers, it measurably cuts the energy load the heater has to supply. Households using around 155 litres or less of hot water a day see instantaneous heaters run 24-34% more efficiently than storage tank equivalents, and typical Australian usage, at roughly 10-15 minutes of combined showering per person per day, falls right in that range.
Commission the system before handover
Even the best-designed system will fail if no one ensures that it is operating as intended. People should flush the system before leaving the construction site to ensure that no debris from construction is left in the pipes. You should also check the actual flow rate at each fixture to make sure it matches what was specified. Finally, check the manifold for leaks while the system is running at full pressure and, if a recirculation loop is installed, adjust the timer. This dry run catches installation errors while they’re still cheap to fix, rather than after the homeowner’s moved in and the walls are painted.
The design order is the whole point
None of this works if the sequence gets reversed. Fixture demand sets the numbers, pipe layout sets the delivery, and the heater gets chosen to match what the first two steps already decided. Do it in that order and an electric instantaneous unit stops looking like a product choice and starts looking like the logical result of a house built to actually perform.